基于单片机的手动、自动调光台灯设计
来源:56doc.com 资料编号:5D21699 资料等级:★★★★★ %E8%B5%84%E6%96%99%E7%BC%96%E5%8F%B7%EF%BC%9A5D21699
资料以网页介绍的为准,下载后不会有水印.资料仅供学习参考之用. 密 保 惠 帮助
资料介绍
基于单片机的手动、自动调光台灯设计(论文15000字)
摘要:针对现在学生有时候晚上熬夜看书学习,尤其是在学校宿舍里,台灯的灯光的亮度调整有限,容易影响别人休息,只能用被子将自己整个盖住的情况下使用台灯。本文采用PWM脉宽调制技术的方法,设计了一个基于单片机PWM的自动、手动调光的台灯,达到了既可以根据周围光线自动的调节台灯的亮度,又可以根据自己的需要手动调节灯光的亮度;当人坐姿不正确或者不小心睡着的时候,蜂鸣器会发出警报声,且这个功能可以通过按键开启或关闭的效果。
关键词:PWM;调光;自动;手动;单片机
Design of Manual and Automatic Dimming Lamp Which Based on Single Chip Microcomputer
Abstract:For students stay up late reading and learning at night sometimes, especially in the school dormitory, the adjustment of the lamp’s brightness is limited. It is easy to affect others to rest. The only way to use the lamp is to cover their own with the quilt. In this paper, we use PWM pulse width modulation technology, the design of a single-chip PWM automatic, manual dimming of the lamp, to achieve both according to the surrounding light automatically adjust the brightness of the lamp, but also according to their own needs to manually adjust the brightness of the light; We can also remotely adjust the brightness of the light through the infrared remote control. When people sit incorrectly or accidentally, the buzzer will sound at the same time.
Key words:PWM;dimming;automatic;manual;single chip microcomputer
目 录
1引言••••••••••••••••••••••••••••••••••••••••••••••••••••••1
2国内外现状••••••••••••••••••••••••••••••••••••••••••••••••1
2.1国内现状••••••••••••••••••••••••••••••••••••••••••••••••••••••••••••••••1
2.2国外现状••••••••••••••••••••••••••••••••••••••••••••••••••••••••••••••••1
2.3所存在的问题••••••••••••••••••••••••••••••••••••••••••••••••••••••••••••1
3本文目标以及实施方案••••••••••••••••••••••••••••••••••••••2
3.1本文目标••••••••••••••••••••••••••••••••••••••••••••••••••••••••••••••••2
3.2实施方案••••••••••••••••••••••••••••••••••••••••••••••••••••••••••••••••2
4硬件选择••••••••••••••••••••••••••••••••••••••••••••••••••2
4.1灯的选择••••••••••••••••••••••••••••••••••••••••••••••••••••••••••••••••3
4.2灯亮度控制方式的选择••••••••••••••••••••••••••••••••••••••••••••••••••••3
4.3照明驱动方式的选择••••••••••••••••••••••••••••••••••••••••••••••••••••••3
4.4光敏电阻及A/D转换的选择••••••••••••••••••••••••••••••••••••••••••••••••3
4.5按键的选择••••••••••••••••••••••••••••••••••••••••••••••••••••••••••••••4
4.6编码器模块的选择••••••••••••••••••••••••••••••••••••••••••••••••••••••••4
4.7单片机的选择••••••••••••••••••••••••••••••••••••••••••••••••••••••••••••5
5电路设计••••••••••••••••••••••••••••••••••••••••••••••••••6
5.1下载程序电路••••••••••••••••••••••••••••••••••••••••••••••••••••••••••••6
5.2电源供电电路••••••••••••••••••••••••••••••••••••••••••••••••••••••••••••7
5.3指示灯电路••••••••••••••••••••••••••••••••••••••••••••••••••••••••••••••7
5.4按键电路••••••••••••••••••••••••••••••••••••••••••••••••••••••••••••••••8
5.5 PWM调光电路•••••••••••••••••••••••••••••••••••••••••••••••••••••••••••8
5.6光敏电阻电路••••••••••••••••••••••••••••••••••••••••••••••••••••••••••••9
5.7编码器电路••••••••••••••••••••••••••••••••••••••••••••••••••••••••••••••9
5.8红外接近传感器和蜂鸣器电路•••••••••••••••••••••••••••••••••••••••••••••10
6软件设计•••••••••••••••••••••••••••••••••••••••••••••••••10
7调试•••••••••••••••••••••••••••••••••••••••••••••••••••••11
7.1硬件调试•••••••••••••••••••••••••••••••••••••••••••••••••••••••••••••••11
7.1.1静态调试•••••••••••••••••••••••••••••••••••••••••••••••••••••••••11
7.1.2动态调试•••••••••••••••••••••••••••••••••••••••••••••••••••••••••11
7.2软件调试•••••••••••••••••••••••••••••••••••••••••••••••••••••••••••••••12
8结果及评论•••••••••••••••••••••••••••••••••••••••••••••••12
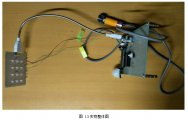
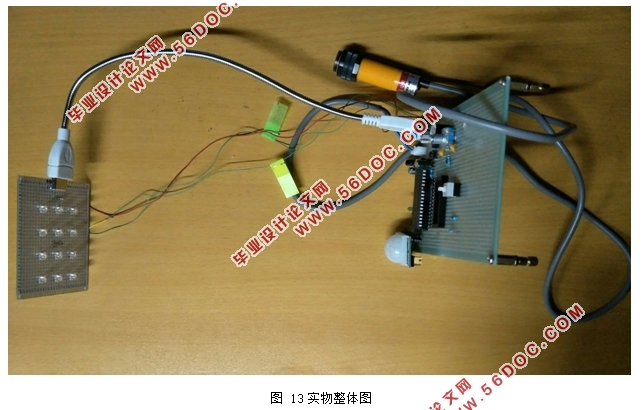
7.1实物图•••••••••••••••••••••••••••••••••••••••••••••••••••••••••••••••••14
7.2结果图及评论•••••••••••••••••••••••••••••••••••••••••••••••••••••••••••16
9结论•••••••••••••••••••••••••••••••••••••••••••••••••••••16
参考文献••••••••••••••••••••••••••••••••••••••••••••••••••16
致谢••••••••••••••••••••••••••••••••••••••••••••••••••••••16
|