有压边装置的后续拉深模运动仿真(Proe三维图,仿真视频)
来源:56doc.com 资料编号:5D11688 资料等级:★★★★★ %E8%B5%84%E6%96%99%E7%BC%96%E5%8F%B7%EF%BC%9A5D11688
资料以网页介绍的为准,下载后不会有水印.资料仅供学习参考之用. 密 保 惠 帮助
资料介绍
有压边装置的后续拉深模运动仿真(Proe三维图,仿真视频)(任务书,中期检查表,论文说明书8100字,Proe三维图,仿真视频动画)
摘 要
拉深是利用金属的塑性变形,用拉深工艺可以制得筒形,阶梯形等直壁旋转体零件,也可以制成方盒形等直壁非旋转体零件。采用弯曲成形的零件种类繁多,这里主要以有压边装置的后续拉深模进行说明。
本毕业设计所要解决的问题是通过动画的形式来阐述:模具根据橡皮弹力的不同对工件进行两次弯曲,得到了筒形拉深件,借助Pro/ENGINEER软件中动画命令使模具工作过程和原理变得很容易理解。并进一步学习和理解Pro/ENGINEERe软件的高级命令。
关键词:弯曲 Pro/ENGINEER 动画 后续拉深
There are follow-up device Blankholder Drawing Die Motion Simulation
Abstract
Drawing is the use of metal plastic deformation, the deep drawing process can be obtained cylindrical, straight wall, such as ladder-shaped rotating body parts can also be made, such as straight-walled box-shaped body of non-rotating parts. Bending the use of a wide range of parts, where the main devices in a follow-up Blankholder Drawing Die explain.
The graduated design problem to be solved through the animation of the form: elastic rubber mold in accordance with the two different bending of the workpiece has been drawing tube, using Pro / ENGINEER software in order to make animation work process and the principle of mold become very easy to understand. And further study and understanding of Pro / ENGINEERe senior command software.
Keywords: Bending Pro / ENGINEER drawing animated follow-up
目 录
1. 绪论………………………………………………………………………………1
1.1 Pro/ENGINEER简介 ……………………………………………………………1
1.1.1 Pro/ENGINEER的特点…………………………………………………………1
1.1.2 Pro/ENGINEER的模块与功能 ………………………………………………2
2本次设计论述所要解决的问题……………………………………………………8
3 动画制作总过程…………………………………………………9
3.1动画的制作步骤简介 ……………………………………………………………9
3.2带压边装置的后续拉深模模具动画的制作进度 ………………………………9
4 动画详细步骤……………………………………………………………………10
4.1 Pro/E 3.0动画模块的初步认识………………………………………………10
4.2模具拉深动画制作……………………………………………………………14
4.3 MPG格式视频动画后序处理工作………………………………………………21
5总结 ………………………………………………………………………………23
6致谢……………………………………………………………………………24
7参考文献 …………………………………………………………………………25
插图清单
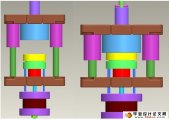
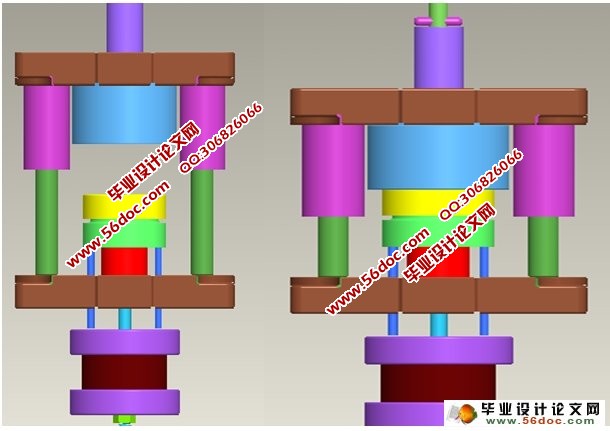
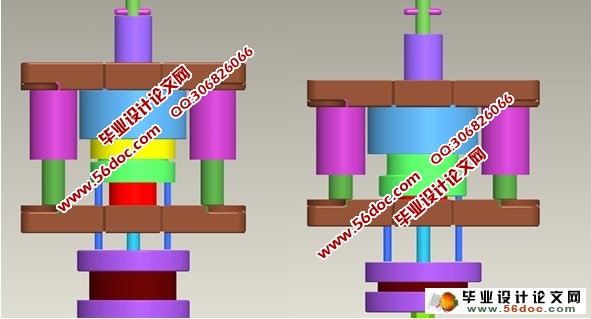
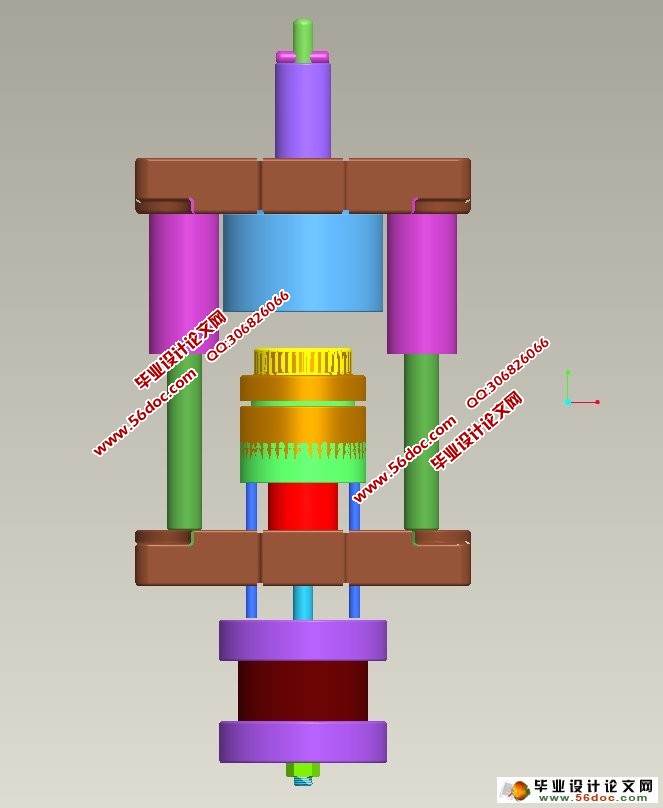
图2-1模具总装图………………………………………………………………………………8
图4-1 定向视图………………………………………………………………………………10
图4-2 动画工具条……………………………………………………………………………10
图4-3 建立动画名称 ………………………………………………………………………11
图4-4 创建主体………………………………………………………………………………12
图4-5 创建关键帧序列 ……………………………………………………………………12
图4-6 点拖动…………………………………………………………………………………13
图4-7 送料完成………………………………………………………………………………13
图4-8上模下行………………………………………………………………………………14
图4-9解除约束………………………………………………………………………………15
图4-10建立动画名称………………………………………………………………………15
图4-11 拉深完成……………………………………………………………………………15
图4-12 创建关键帧序列 …………………………………………………………………16
图4-13 动画回放 …………………………………………………………………………16
图4-14 捕获对话框…………………………………………………………………………17
图4-15 上模回程 …………………………………………………………………………17
图4-16创建关键帧序列……………………………………………………………………18
图4-17 拉深完成 取件……………………………………………………………………19
图4-18创建关键帧序列……………………………………………………………………19
图4-19 动画回放……………………………………………………………………………20
图4-20 动画捕获……………………………………………………………………………20
图4-21动画合并……………………………………………………………………………21
|